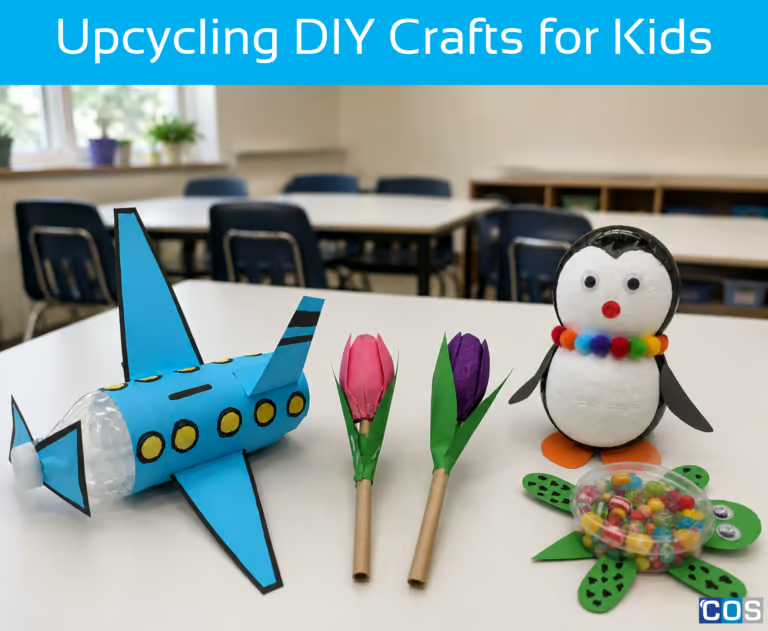
Looking for a fun, hands-on activity to keep the kids entertained and inspired?
Pipe cleaners are a craft-time favourite for a reason, they’re colourful, flexible, and incredibly versatile! With just a few twists and turns, children can transform a simple pipe cleaner into a whole world of imaginative creations.
Whether it’s a holiday activity, a classroom project, or just some quiet weekend fun, pipe cleaner crafts are a great way to develop fine motor skills, encourage self-expression, and build confidence through creativity.
To get you started, we’ve created 4 easy and adorable pipe cleaner projects that are perfect for little hands and big imaginations: a cheerful snail, a festive mini wreath, a fluttery butterfly, and a playful finger puppet monster. Each craft is easy to make and full of character, so gather your colourful pipe cleaners and let the fun begin.
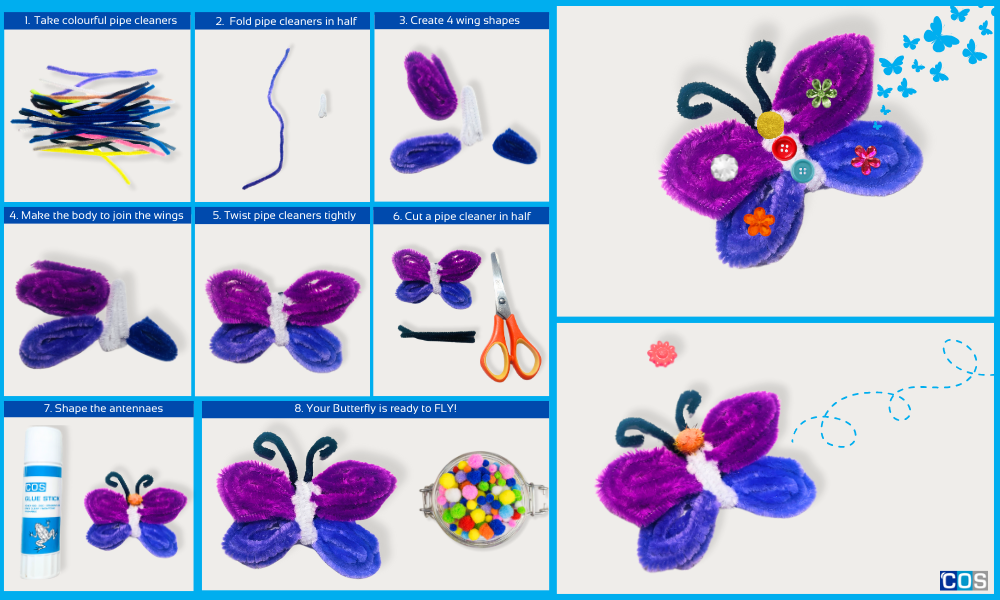
1. Twist and Flutter: Pipe Cleaner Butterfly
Materials Needed:
- Coloured pipe cleaners (4 for wings, 1 for antennae, and 1 for body)
- Scissors
- Glue stick (optional)
- For decoration (pom-poms, rhinestones, sequins, or buttons)
Step-by-Step Instructions:
1. Create the Wings
- Take 4 pipe cleaners (same or different colours).
- Fold each pipe cleaner in half, then twist the ends together to form a rounded oval shape, these will be the butterfly’s top and bottom wings.
- You should now have 4 oval wing shapes.
2. Make the Body
- Take a pipe cleaner and place it over the centre where the wings will be joined.
Don’t twist yet, just position it over the centre.
3. Attach the Wings
- Lay the 4 wings side by side in the shape of a butterfly, 2 wings on each side (top and bottom).
- Carefully gather the centre of all 4 wings together.
Wrap the body pipe cleaner tightly around the centre of the wings to secure them in place. Twist it firmly so everything holds together.
4. Shape the Antennae
- Cut a small pipe cleaner in half to create two short pieces.
- Curl the top ends of the pipe cleaner using your fingers or a pencil to form spiral antennae.
5. Adjust and Decorate
- Gently spread and shape the wings so they look symmetrical and rounded.
- Optional: Add buttons, sequins, pom-poms, rhinestones, or beads to the wings and body for extra sparkle and personality.
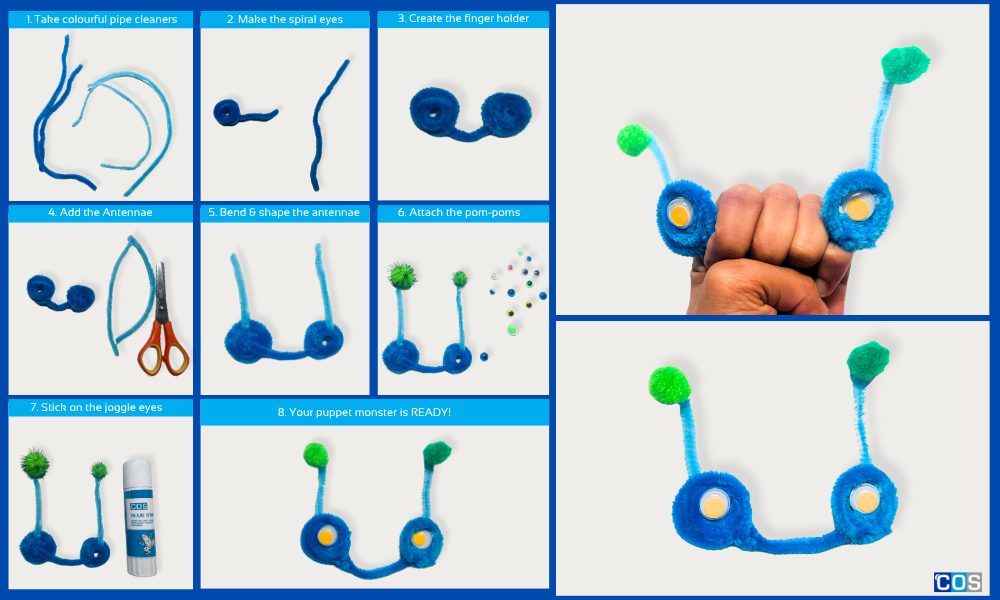
2. Mini Pipe Cleaner Puppet Monster
Materials Needed:
Step-by-Step Instructions:
1. Make the Eye Spirals
- Take two pipe cleaners and wrap each one around your finger (or a thick marker) to form two springy spirals. These will be the monster’s eye bases that sit on your finger.
2. Create the Finger Holder
Use another pipe cleaner to connect the two spirals together at the base, forming a stable loop or band that makes it easy to wear the puppet like a ring.
3. Add the Antennae
Take two pipe cleaners and twist or attach them to the top of each spiral. Bend and shape them to look like funny antennae sticking out.
4. Attach the Pom-Poms
Glue or twist a large pom-pom onto the top of each antenna. These add fun and fluff to your monster’s look.
5. Stick on the Joggle Eyes
- Place two large googly eyes in the centre of each spiral. This makes your monster look wide-eyed and full of personality!
6. Bring Your Monster to Life!
Slip the puppet onto your finger and have fun making your wacky monster wiggle, bounce, and play!
3. Cute & Curly Pipe Cleaner Snail
Materials Needed:
- 4 x pipe cleaners (different colours work best)
- 2 x joggle eyes
- Glue
- Pencil
Scissors (if needed)
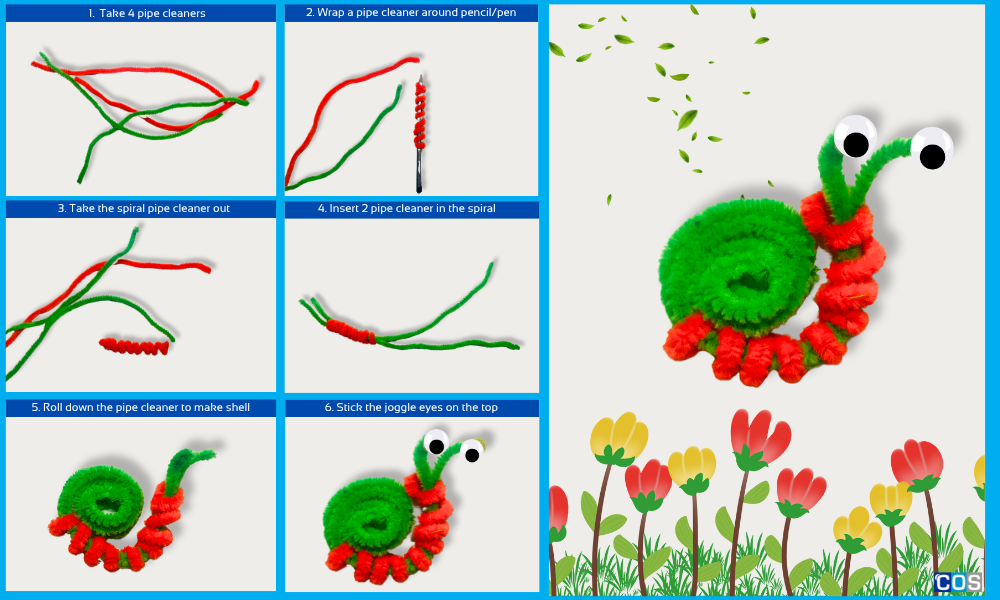
Step-by-Step Instructions:
1. Create the Coil
- Choose one pipe cleaner to make the spiral coil.
- Roll the pipe cleaner into a tight spiral/coil on a pen/pencil.
2. Create the Body
- Take two pipe cleaners and insert them through the centre of the spiral.
- Leave some length extending out the front and bottom to form the snail’s shell and antennae.
- Gently twist the pipe cleaner creating a coil to create the shell.
3. Add Eyes
- Glue the joggle eyes onto the tips of the two untwisted pipe cleaner ends (the antennae).
4. Wreath-Making Magic with Pipe Cleaners
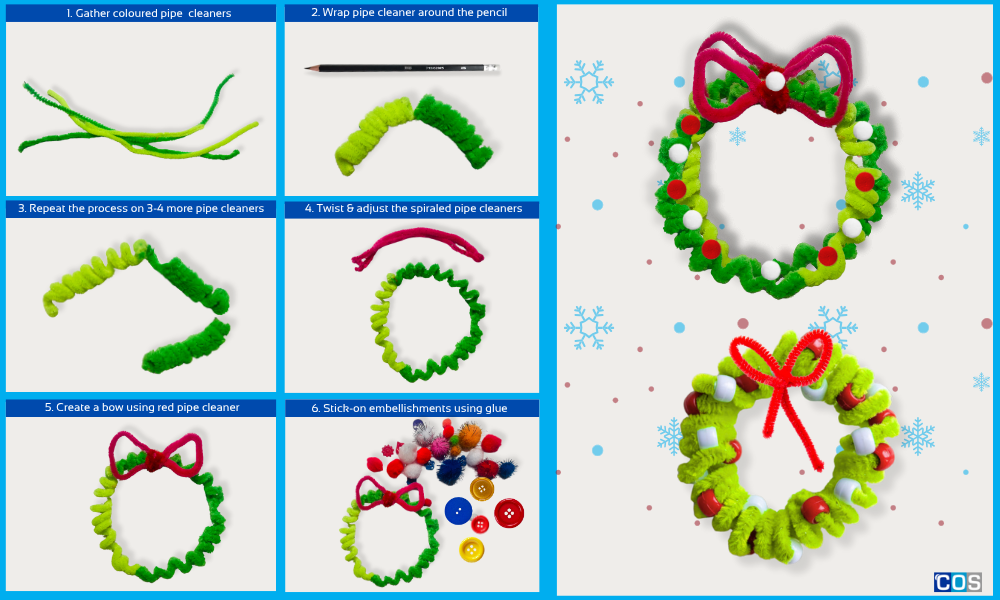
Step-by-Step Instructions:
1. Create the Base
- Take a pen/pencil and wrap the pipe cleaner around it creating a spiral like structure.
- Repeat the same process on 3-4 more pipe cleaners.
Gently connect and twist the ends of each spiral together to form a circular wreath base.
2. Fluff and Shape
- Bend and spread out the spiraled pipe cleaners to give the wreath a fuller, more textured look.
- Twist and adjust as needed to create a balanced, rounded shape.
3. Add Decorations
- Use red pipe cleaners to make a bow. Fold a red pipe cleaner into a bow shape and twist in the centre.
- Attach it to the centre of the wreath.
Add beads, small bells, pom-poms, or ribbon as you like.