The holidays are all about showing your loved ones just how much you love and care about them, and there’s no better way to do that than by adding a personal, handmade touch to your Christmas gifting. This year, why not try out our easy to make Christmas bookmarks?
These cute Christmas bookmarks are a perfect craft for kids and adults alike! They’re quick and easy to make, and at a pinch can be put together with items you have on your desk. Just grab some gift paper, coloured paper, glue stick, pom poms, and get started!
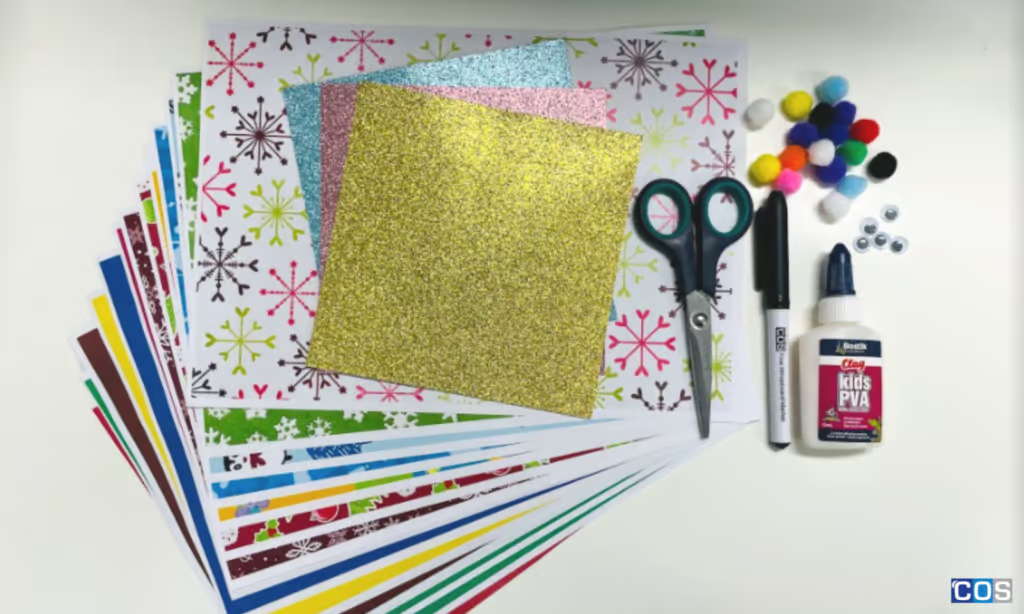
What you will need:
- Coloured copy paper or traditional origami paper (if you have it)
- Scissors
- Pencil
- Coloured marker
- Any round object to help make a circle
- PVA glue
- Pom poms
- Joggle eyes
- Glitter Paper
Step-by-Step Instructions for Making your Christmas Bookmarks:
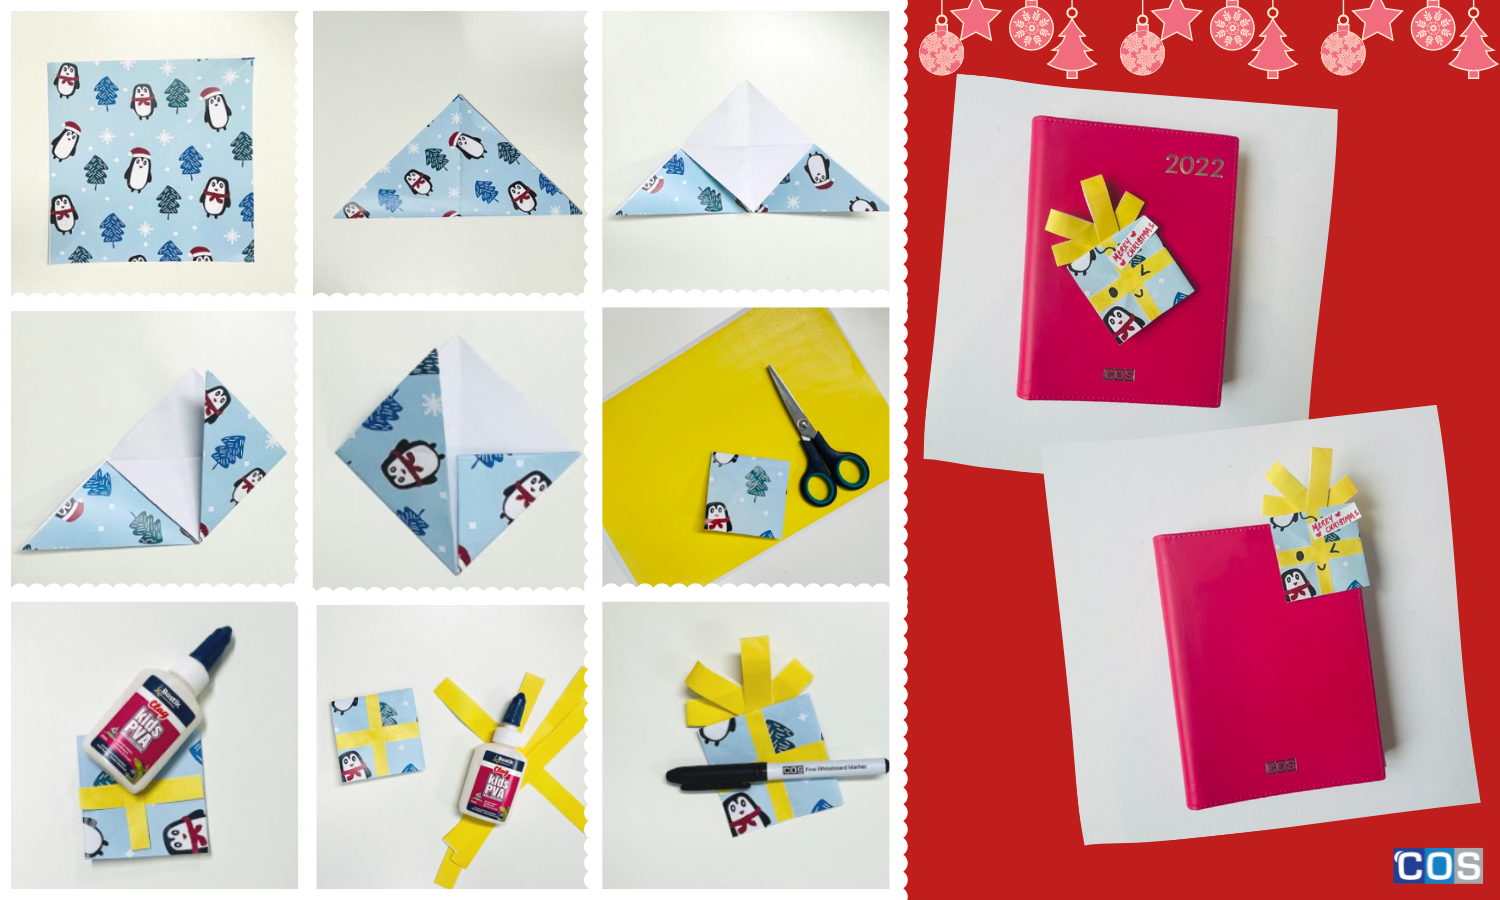
- Cut a 15 × 15 cm sheet of paper (we’ve used penguins!) and fold it diagonally to make a triangle (give it a fold both ways so you have a nice strong crease)
- Fold back corner on one side – point should meet edge of paper
- Take each corner at the base of the triangle & fold each up to the centre point, now you will have a square
- Your square will be left with two loose pieces
- Fold each of the flaps and tuck them inside
- Take a contrasting colour sheet of paper (we’ve used yellow) and cut two strips to make a “gift box ribbon”. Cut the strips approximately 1 – 1.5cm wide. Stick them down with PVA glue
- Now cut four strips. Two 12cm x 1cm and the other two 10 cm x 1cm
- Fold them over to make a loop and stick the four loops to the back of your bookmark
- To add a personal touch cut a small rectangular piece of white paper. Write your message and glue it down
Step-by-Step Instructions for Making a Reindeer Bookmark:
- Cut a 15 × 15 cm sheet of brown paper (or whatever colour takes your fancy) and fold it into a triangle (coloured side on the outside). Crease well
- Now fold the tip of the triangle to the bottom. You’ll see a white square within the triangle now
- Take each corner at the base of the triangle and fold each up to the centre point, now you will have a square
- Tuck both “flaps” in the pocket. Your reindeer bookmark is now ready to be decorated
- Draw two antlers on brown paper and cut them out. Glue the antlers onto the back of triangle
- Now take two joggle eyes and stick them on each side of the triangle
- Take a red pom-pom and stick it with glue on top of triangle to make a nose

Step-by-Step Instructions for Making a Santa Bookmark:
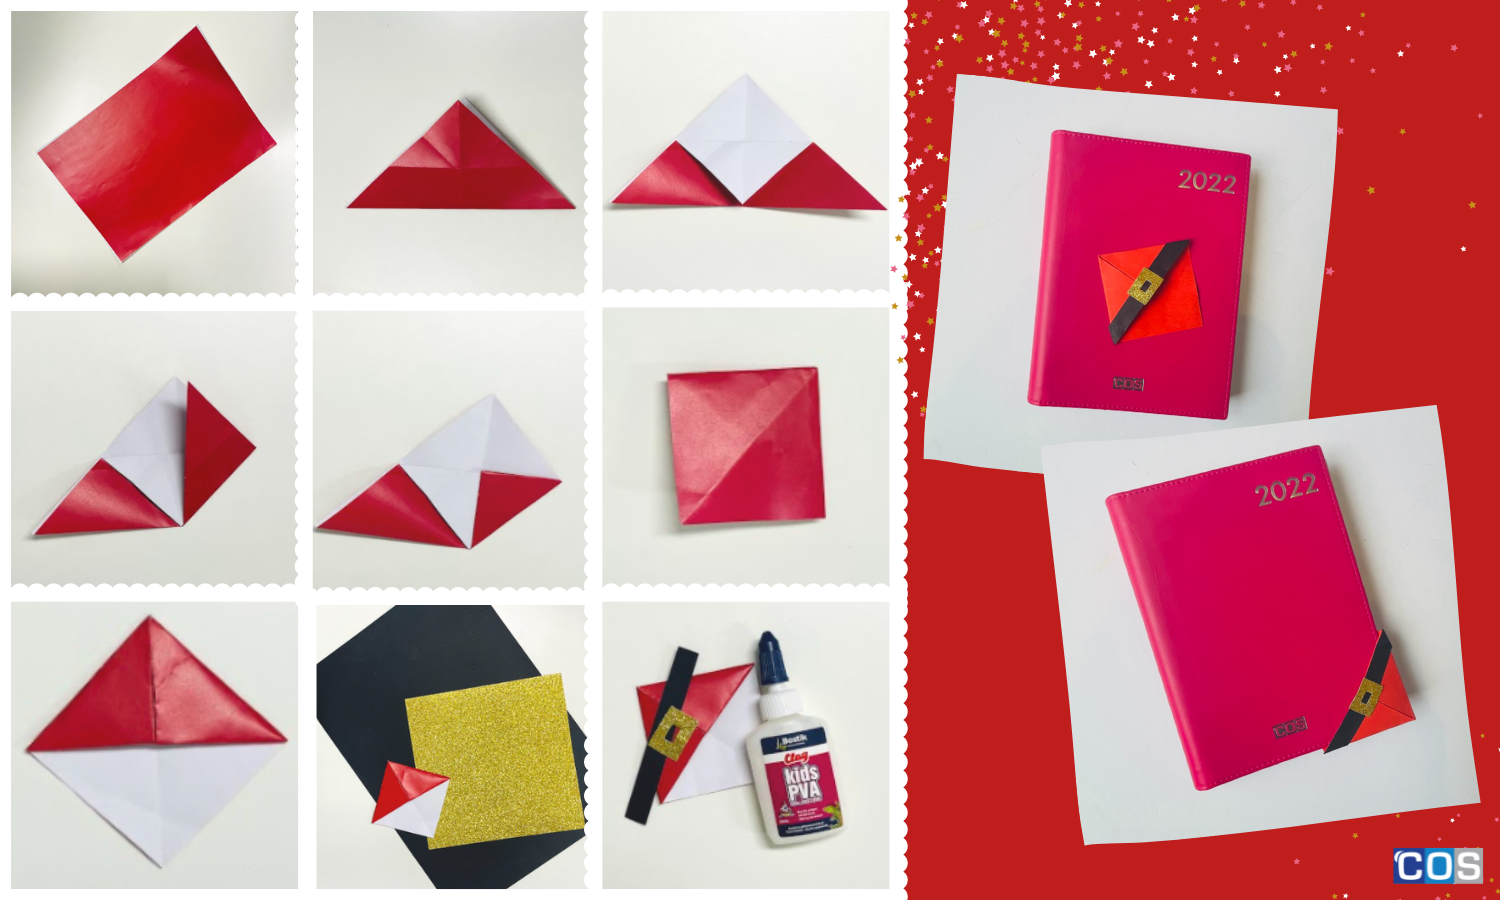
- Cut a 15x15cm piece of red paper and fold it in half diagonally, making a nice crease
- Fold back corner on one side – point should meet edge of paper
- Take each corner at the base of the triangle & fold each up to the centre point, now you will have a square
- Your square will be left with two loose pieces
- Fold each of the flaps and tuck them inside
- Now take a sheet of black copy paper and cut a 1 – 1.5cm wide strip. Glue the strip on bottom of the triangle
- Take some decorative paper (we’ve used gold glitter) and draw a belt buckle. Stick it in the middle of the black strip
- HO HO HO!!! Your bookmark is ready to sleigh
Step-by-Step Instructions for Making the Snowman Bookmark:
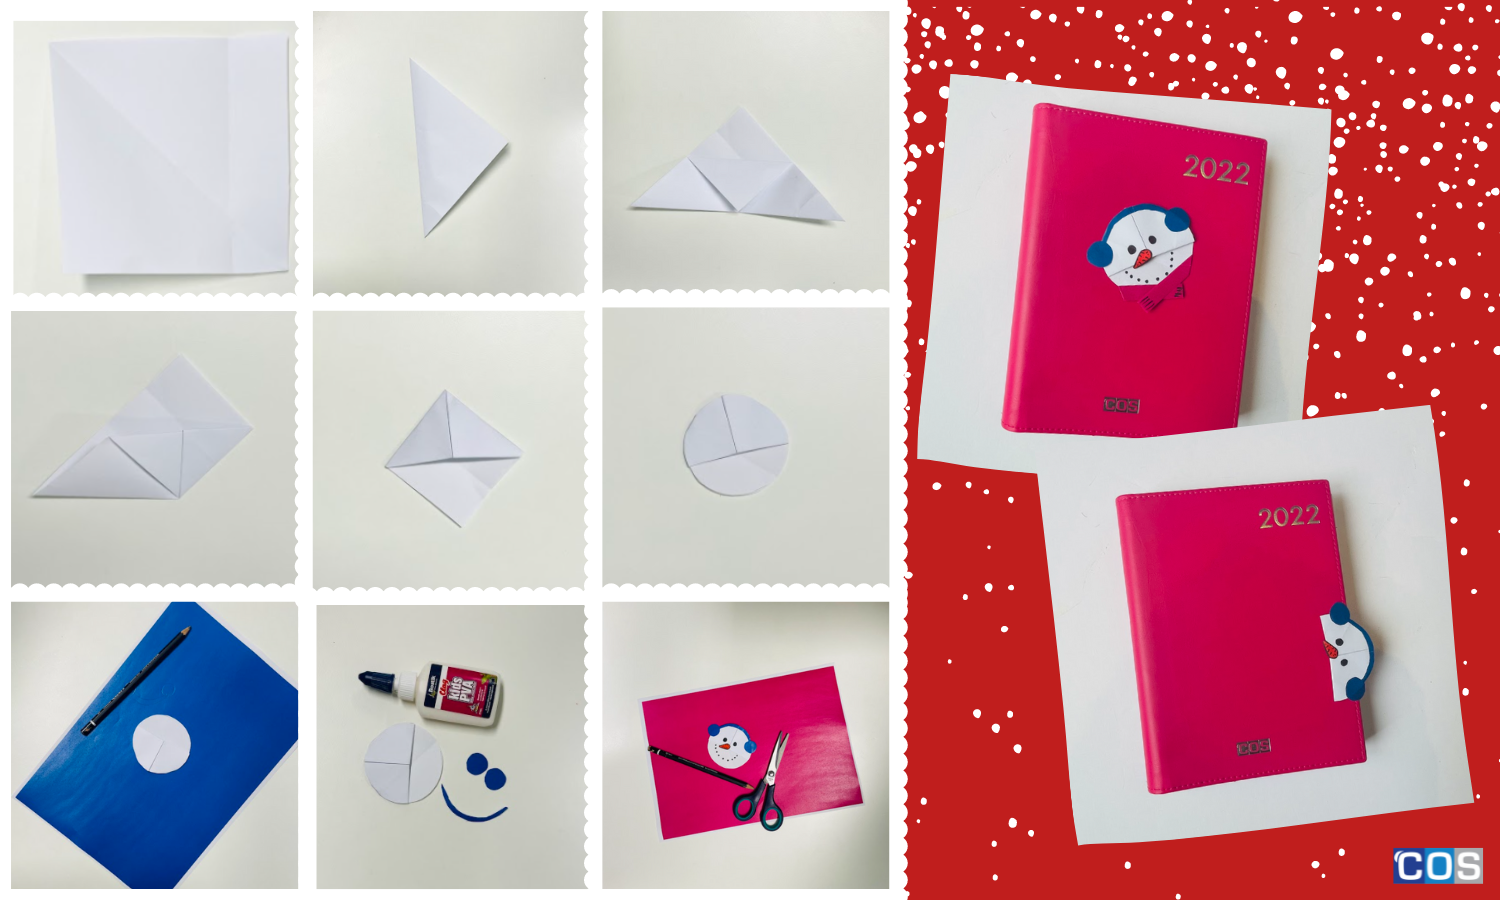
- Cut your white copy paper to 15x15cm and fold it over one corner to create a triangle
- Take the paper from the bottom left corner and bring it to the centre point at the top, with the triangle facing upwards. At this point, be careful to fold properly
- Fold the lower right corner up to meet the top right-angled corner. Repeat on the left side and fold these two back open
- Fold the flaps you created back up and tuck them into your bookmark. Your bookmark is ready
- Now take the bookmark and draw a circle, you can use a bottle or any circular object
- Cut the circle out carefully, making sure it has two straight edges on the folded sides. Now it’s time to decorate
- Take a contrasting colour of paper (we’ve used blue) and trace the top of the bookmark to create a half-circle
- Now draw 2 small circles on each side to make it look like an earmuff. Cut it and glue it on the top of bookmark
- Take another sheet of coloured paper (we’ve used pink) and cut two strips approximately 1 – 1.5cm wide to make a scarf. Cut it and glue them on bottom
- To make a face, start by drawing eyes and nose using a black and orange marker
If you’re planning to give books as a gift this year, don’t forget to include these cute festive bookmarks. These Christmas bookmarks would also make a great activity or party favour at your holiday get-togethers.
Watch the video for detailed instructions: