As Halloween creeps closer, now is the perfect time to start planning activities that spark kids’ creativity and build excitement for the big day.
For teacher & parents, DIY treat bags are a wonderful way to mix learning with fun. More than just candy holders, these hands-on projects let kids cut, paint, glue, and craft their own spooky masterpieces.
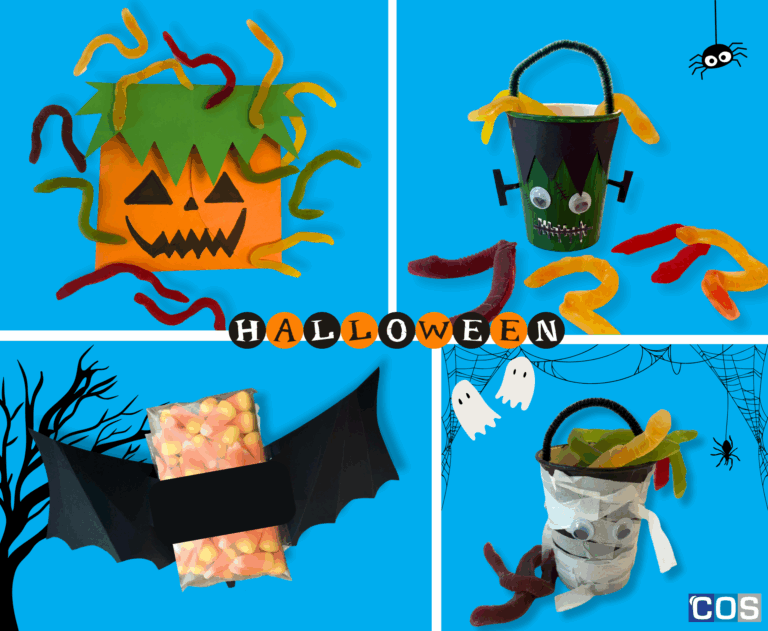
We’ve put together 4 spooky treat bag ideas that are simple, fun, and perfect for little hands. From glowing pumpkin bags and goofy Frankenstein cups to silly mummy treat cups and sleek bat bags ready to “fly,” these DIY creations are far more than containers for sweets. They double as festive decorations, conversation starters, and keepsakes that kids will treasure.
Whether you’re planning a school event, hosting a Halloween party, or greeting trick-or-treaters at the door, these treat bags will add a mix of spooky charm and playful fun, making your celebrations unforgettable long after the last candy is gone.
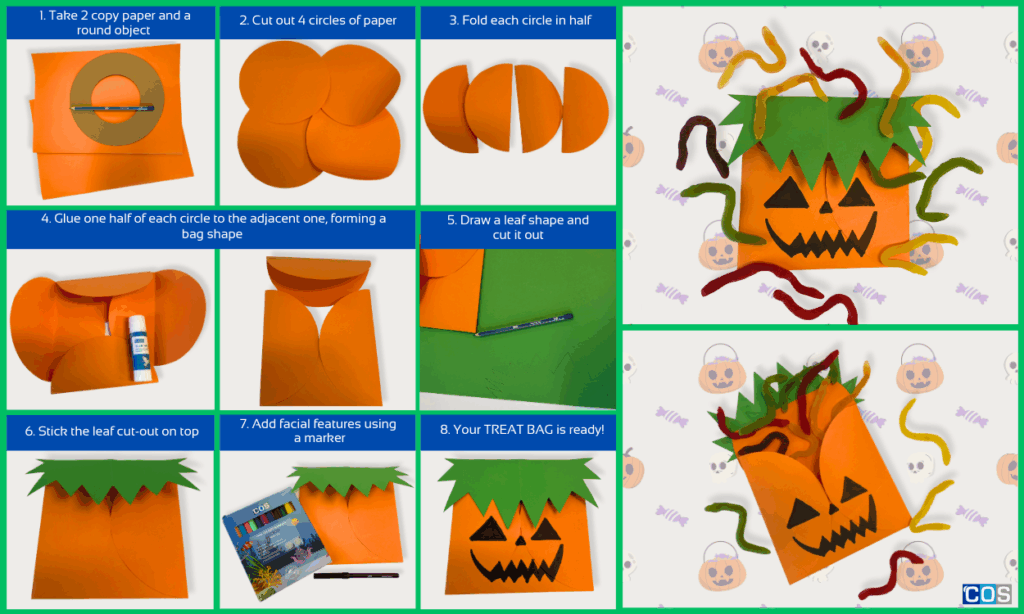
1. Pumpkin-Shaped Treat Bag
Materials Needed:
- 2 sheets of coloured copy paper (for the pumpkin body)
- Round object (to trace circles)
- Extra coloured paper (for leaf and stem)
- Pencil
- Scissors
- Glue Stick
- Coloured markers (for facial features)
- Twine/ribbon (optional, for handle)
- Tape (optional, to secure handle)
- Treats (candies, snakes, lollipops, etc.)
Step-by-Step Instructions:
1. Prepare the Circles
Take 2 sheets of coloured copy paper. Using a round object, trace 4 circles (about 10cm x 5cm) and cut them out with scissors.
2. Fold the Circles
Fold each of the 4 circles in half. Press the crease firmly so the folds stay sharp.
3. Glue the Halves Together
Apply glue to the right half of one circle and attach it to the left half of another. Repeat with the remaining circles to form a closed ring.
4. Form the Bag Shape
Gently fan open the glued circles into a 3D shape. Press along the seams to secure the bag form.
5. Create the Opening
Leave a small gap at the top of the pumpkin to act as the opening for putting in treats.
6. Add a Leaf
Cut a leaf shape from another piece of paper and glue it near the opening to decorate the pumpkin.
7. Attach the Stem
Cut a small spiral from paper, roll or fold it for dimension, and glue it at the top centre of the pumpkin.
8. Draw the Facial Features
Use a marker to draw eyes, nose, and mouth.
9. Optional Handle
Punch two small holes near the top opening and thread ribbon or twine through to create a handle. Attach it with a tape if needed.
10. Fill with Treats
Carefully open the top gap of your pumpkin treat bag. Fill it with your choice of goodies, small candies, chocolates, lollipops, snakes, stickers, or other fun surprises. Once filled, gently close the top.
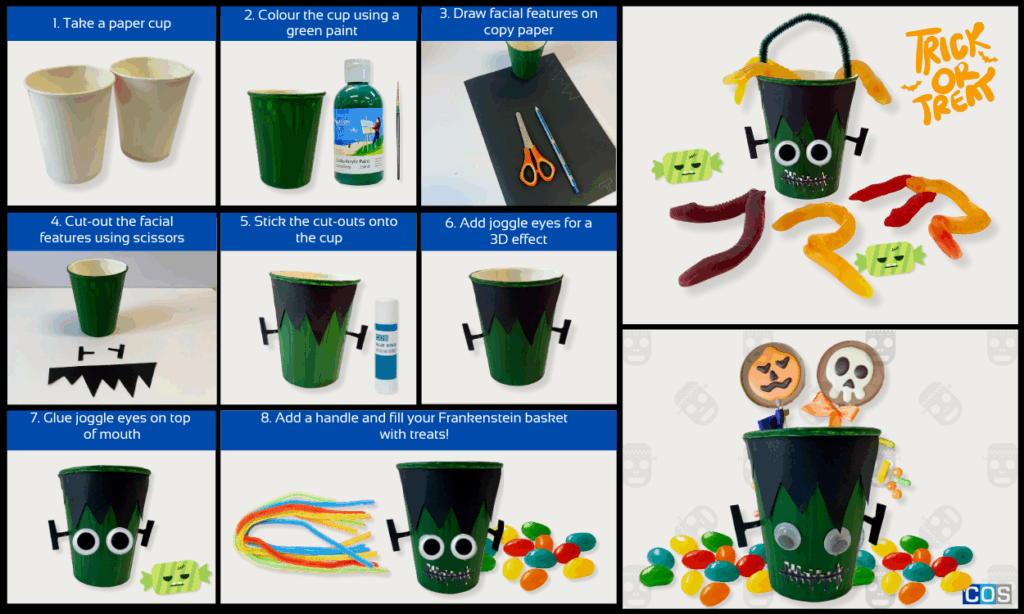
2. Spooky Paper Cup - Frankenstein Treat Basket
Materials Needed:
- Paper cup (plain)
- Green paint + paint brush
- Black copy paper (for hair, bolts, and mouth)
- Joggle eyes
- Pencil
- Chenille stem/pipe cleaner (for handle)
- Glue stick
- Scissors
- Treats to fill the cups (candies, snakes, lollies, etc.)
Tape or hole punch
Step-by-Step Instructions:
1. Take a Paper Cup
Start with a plain paper cup as the base for your Frankenstein treat basket.
2. Paint the Cup
Paint the outside of the cup green to make Frankenstein’s face. Let it dry completely.
3. Add Hair
Cut zigzag strips from black paper for Frankenstein’s jagged hair and glue them around the rim of the cup.
4. Create Facial Features
Cut out a mouth and teeth from black and white paper.
Cut small bolts (or ears) from black paper.
Glue these features onto the cup.
5. Add Joggle Eyes
Glue on Joggle eyes above the mouth to give a fun 3D effect.
6. Attach Handle
Punch two holes on opposite sides of the cup near the top. Insert the ends of a chenille stem into each hole, twist to secure, and bend into a handle.
7. Fill & Enjoy
Fill your Frankenstein basket with treats! The basket makes a perfect party favour, classroom activity, or table decoration.
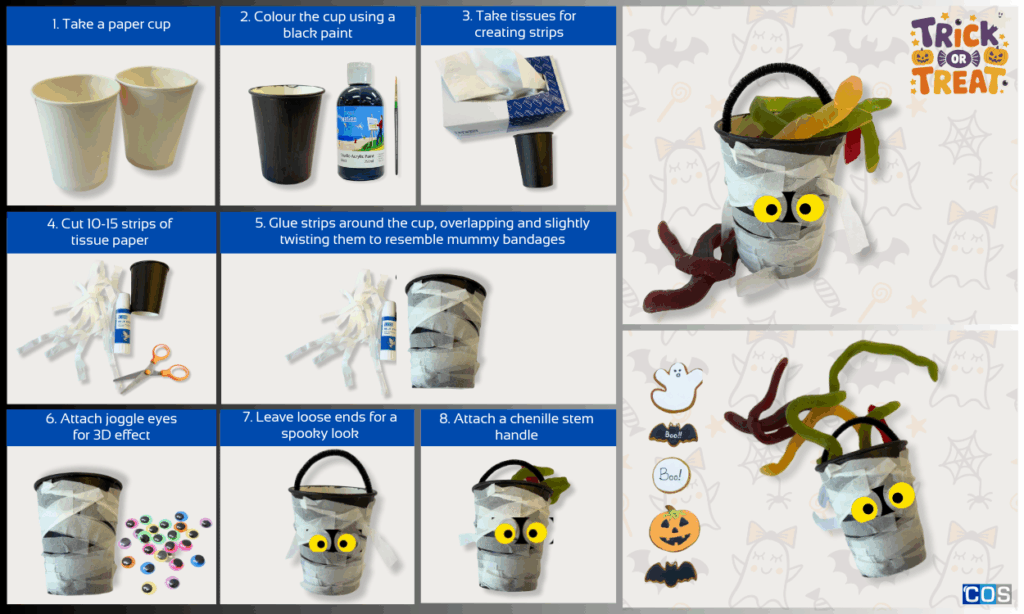
3. Mummy-Inspired Treat Cups
Materials Needed:
- Paper cup
- Black paint and paintbrush
- White tissue paper
- Pipe cleaner/chenille stems
- PVA glue or glue stick
- Joggle eyes
- Scissors
- Tape or hole punch
- Treats to fill the cups (candies, snakes, lollies, etc.)
Step-by-Step Instructions:
1. Prepare the Paper Cup
Cover your workspace with newspaper. If using white paper cups, paint the outside with a thin coat of black paint. Allow it to dry for 15–30 minutes.
2. Cut Strips from the Tissue
Cut 10–15 strips of tissue paper about 1–2 cm (½–1 in) wide. Rough, uneven edges will give the bandages a more authentic mummy look.
3. Glue the First Strip
- Brush a thin layer of glue around the top section of the cup.
- Press a strip of tissue paper onto the glue and smooth it down lightly, leaving small gaps and folds for texture.
4. Wrap / Layer
- Continue gluing strips around the cup, overlapping and slightly twisting them to resemble mummy bandages.
Be sure to leave a small gap where you’ll place the eyes, or let some loose ends hang for a spooky effect.
5. Add the Joggle Eyes
- Once the strips are secure and dry, attach the joggle (googly) eyes.
- Position them peeking through the bandages, or glue them directly onto the cup and layer a short strip partly over them.
6. Create a Handle
Punch two small holes near the top rim of the cup on opposite sides. Attach a chenille stem (pipe cleaner) through the holes to form a handle, and secure it inside with tape.
7. Finishing Touches
Trim off any extra-long tissue ends, then fill your spooky mummy cup with Halloween treats.
4. Bat Treat Bags
Materials Needed:
- Black copy paper
- Pencil
- Scissors
- Glue stick or tape
- Treats to fill the cups (candies, snakes, lollies, etc
Step-by-Step Instructions:
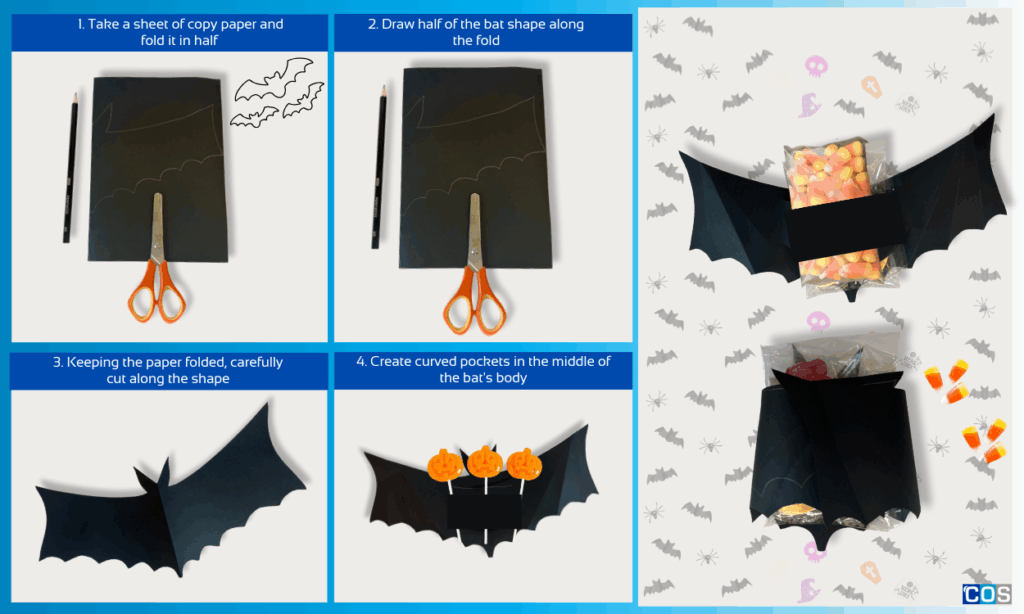
1. Fold the Paper
Take a sheet of copy paper. Fold it in half lengthwise (or widthwise depending on the bat size you want). The fold will be the centreline of your bat.
2. Draw Half Bat Shape
- On one side of the folded paper, use a pencil to draw half of the bat shape along the fold. Include the bat’s body and wings.
- Make sure the bottom is wide enough to hold treats.
3. Cut Out the Bat Shape
Keeping the paper folded, carefully cut along your pencil line. When you unfold, you’ll have a full symmetrical bat shape.
4. Create Curved Pockets for Treats
- In the middle of the bat’s body, cut two curved slits: one on top and one on bottom.
- These will form small pockets to hold the treats.
The curves should be gentle, so the treats don’t fall out.
5. Insert Treats
Slide candies or small treats between the two curved slits. Ensure the treats are securely tucked in.
6. Close the Treat Bag
- Fold the bat wings over the treats so they “hug” the candies.
Optionally, use a small piece of tape or a dab of glue to secure the wings on top if needed.
7. Decorate (Optional)
Draw eyes, fangs, or other spooky details on your bat.