Easter is a joyous time of year, filled with vibrant colours, egg hunts, and the celebration of new beginnings. To kick off the celebrations, we’ve compiled some craft activities that are easy to follow and enjoyable, ensuring a fun-filled creative experience for kids.
Whether it’s crafting pop-up Easter eggs, making paper bunnies, or adorning lollipop sticks with a burst of colours, our guide offers a range of craft activities catering to any preference and age group.
Gather your art supplies, embrace the festive spirit, and embark on a journey of creativity and joy this Easter season!
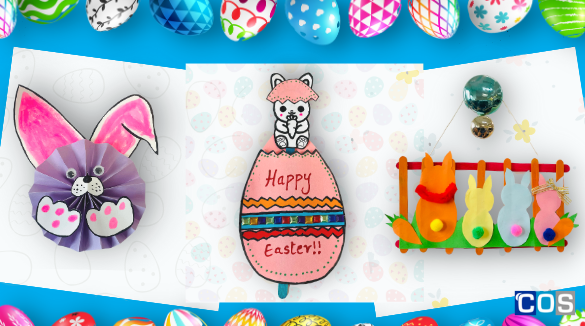
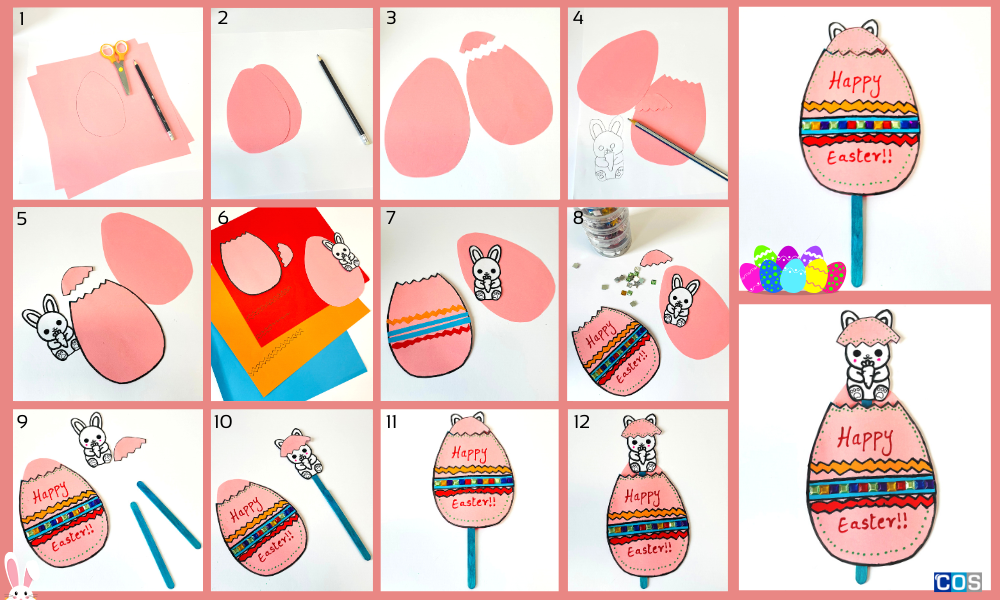
Popstick Pop-up Easter Egg
Things you’ll need:
- Coloured copy paper
- Coloured marker
- Pencil
- Scissors
- Glue stick
- Decorations of your choice – pom poms, sequins, or buttons
- Rainbow timber popsticks
Instructions:
- Begin by cutting out two egg shapes on A4-coloured paper, ensuring they are sized appropriately to fit on a popsicle stick.
- Take one of the egg cut-outs and draw a cracked egg design on top to create a cracked effect for the front portion.
- Use markers, coloured pencils, or other decorative embellishments such as stickers or pom-poms to decorate the egg cut-out. This can also include drawing patterns or writing messages.
- Once decorated, apply glue to one of the egg cut-outs, leaving space in the centre for inserting the popstick.
- Once the egg is decorated, draw a bunny on another piece of A4 coloured paper, ensuring it is sized to fit easily inside the egg cut-outs.
- After drawing, cut out the bunny shape and attach it to the top of the popsicle stick using a glue stick.
- Take the cracked egg cut-out and paste it over the bunny, ensuring that when the bunny is inserted, the egg closes securely.
- Your cute bunny pop-up egg is now ready!
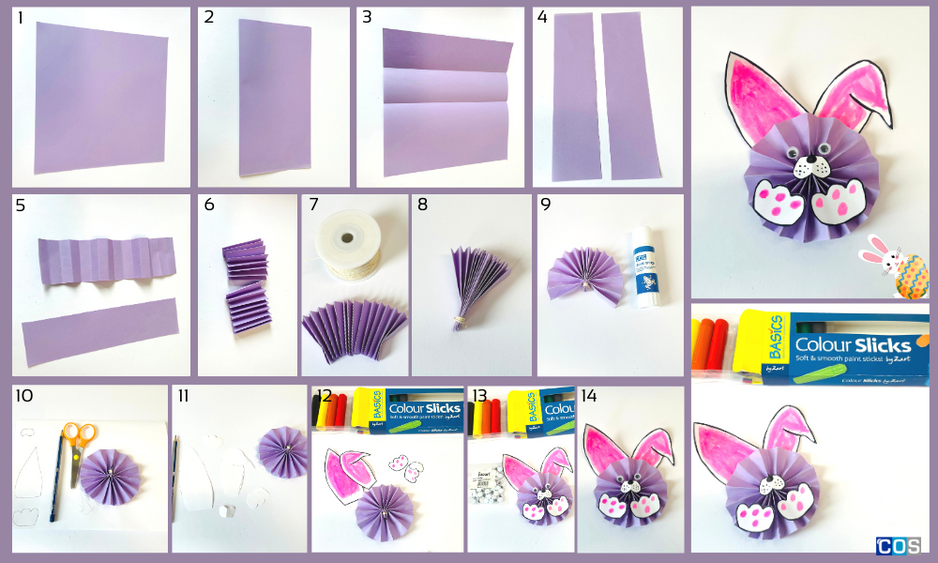
Paper Bunny
Instructions:
- Take an A4-sized coloured copy paper and mark 4 cm in width and 15cm in length and cut two strips of the same size.
- Fold both the cut-out strips accordion-style and secure them together from one end using glue.
- Hold the folds closely packed and tie the paper at the centre using twine.
- Unfold the accordion folds from both sides and stick the ends together to create a circular shape.
- On another white sheet, draw and cut out a pair of ears and paws.
- Create small circles for the nose, mouth, and eyes, then cut them out.
- Decorate the ears by filling them in, and use a pink crayon, slick paint, or pencil colour as shown in the picture.
- Similarly, stick the paws to the lower part of the circle.
- Fill the nose with a pink colour and add a 3D effect to the eyes using joggly eyes.
- Paste the two smaller circle cutouts at the centre, overlapping each other to form the rabbit’s mouth.
- Finally, complete the face of the paper Easter bunny by sticking a pair of eyes to the upper part.
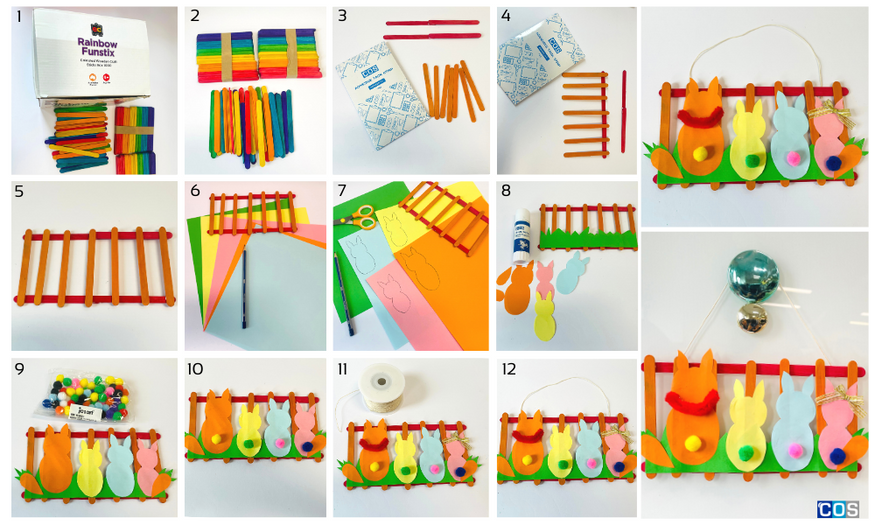
Easter Hanging Decoration
Things you’ll need:
- Coloured copy paper
- Pencil
- Scissors
- Glue stick
- Decorations of your choice – pom poms, sequins, or buttons
- Twine
- Rainbow timber popsticks
- Adhesive tack
Instructions:
1. Take colourful popsticks, apply some adhesive tack and start pasting the popsticks adjacent to one another and wait until it’s dry.
2. To craft bunny shapes, take four coloured sheets of your choice and draw different-sized bunnies that can fit seamlessly onto the popstick frame.
3. To create a background effect, draw grass on green coloured paper, and cut it out neatly. You can enhance the scenery by adding additional elements like carrots, flowers, or butterflies.
4. Carefully stick the grass cut-out to the structure using adhesive tack and allow it to dry completely.
5. Now it’s time to stick the bunnies onto the popstick using an adhesive tack.
6. Use pop poms on the bunny backs to mimic tails, you can also adorn bunnies by adding a bow or rhinestones on their back.
7. Use twine and attach it securely to the popstick sides with a tack to create a cute hanging decoration.