

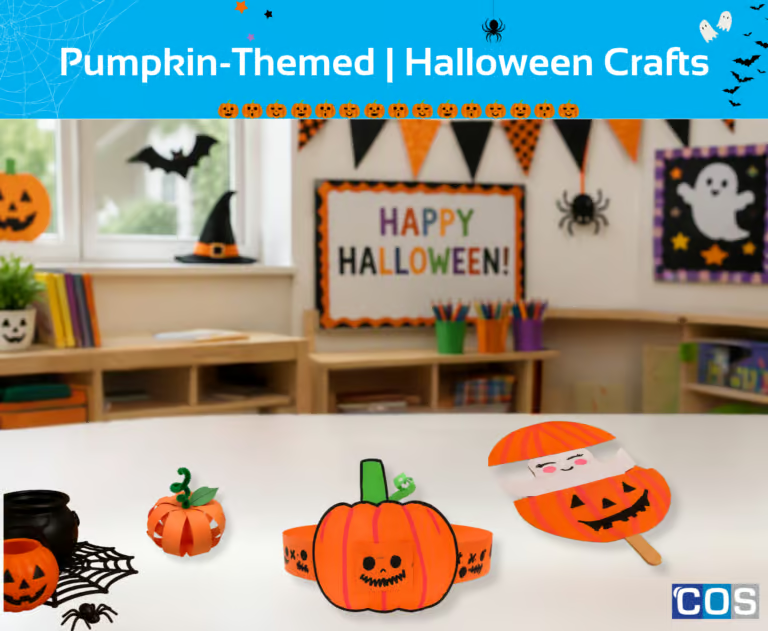
Get ready for some hands-on Halloween creativity with 3 fun pumpkin-themed DIY crafts that children will love making and displaying.
We have created a Pumpkin Hanging Decoration, design a wearable Pumpkin Paper Bracelet, and make an interactive Pumpkin Pop-up Ghost featuring a ghost that magically pops in and out of a pumpkin.
These easy to make crafts encourage creativity, cutting and fine motor skills while providing plenty of opportunities for children to personalise their creations. Perfect for classrooms, childcare settings, Halloween parties or at-home crafting, these festive pumpkin projects are sure to bring smiles, imagination and a touch of Halloween magic to your celebrations.
1. Pumpkin Hanging Decoration
Create a colourful pumpkin hanging decoration using folded paper strips. This fun Halloween craft encourages creativity while helping children practise measuring, cutting and assembling.
Once complete, the pumpkins can be displayed around the classroom, at home or as part of a festive Halloween display.
Materials Needed:
- Coloured copy paper
- Pencil
- Ruler
- Scissors
- Coloured markers, crayons, or pencil colours
- Glue stick / PVA glue
- Pipe cleaners
- Ribbon, cord, or string
Step-by-Step Instructions:
Step 1: Measure the Paper Strips
- Choose two sheets of coloured copy paper, such as orange and yellow, or two different shades of orange.
- Using a ruler and pencil, measure and mark strips that are 2cm wide x 15cm long.
- These strips will be used to create the pumpkin shape, so try to keep the measurements as accurate as possible.
Step 2: Cut Out the Strips
- Carefully cut along the pencil lines to create your paper strips.
- You will need 4 strips in total for each pumpkin decoration.
- Place the strips neatly together and ensure all strips are approximately the same size so the finished pumpkin looks symmetrical.
Step 3: Create the First Star Shape
- Take four strips and arrange them in a star pattern by overlapping them in the centre.
- Position one strip vertically, one horizontally, and the remaining two diagonally to create an even eight-point effect. This forms the front half of your pumpkin decoration.
Step 4: Secure the Strips Together
- Apply a small amount of glue to the centre where all four strips overlap. Press firmly and allow the glue to set.
- Keeping the strips secured in the centre makes it easier to shape the pumpkin in the next steps.
Step 5: Form the Pumpkin Shape
- Bring the ends of each strip upwards towards the centre, creating a rounded pumpkin shape. Glue the ends together at the top.
- As you add each strip, the pumpkin will begin to take on a three-dimensional appearance.
Step 6: Create the Second Pumpkin Half
- Using the remaining four strips, repeat the same process by arranging them into a star shape and gluing them together in the centre.
- Fold the strip ends upwards and secure them together to create a second rounded pumpkin section.
Step 7: Join the Two Sections Together
- Apply glue where the two pumpkin sections meet and carefully attach them together.
- Hold them in place for a few moments until secure. When joined, the two sections create a fuller and more decorative 3D pumpkin shape.
Step 8: Add the Stem and Vine
- Cut a small stem measuring approximately 2 cm x 3 cm from green cardstock and glue it to the top of the pumpkin.
- Then curl a green pipe cleaner around a pencil to create a spiral vine and attach it beside the stem.
Step 9: Attach Ribbon for Hanging
- Cut a piece of ribbon or thread approximately 20cm long. Tie or glue one end to the top of the pumpkin near the stem.
- Ensure it is securely attached so the decoration can be safely hung and displayed.
Step 10: Display Your Pumpkin Decoration
- Once all the glue has dried, your pumpkin decoration is ready to display.
- Hang it from a classroom ceiling, doorway, bulletin board, window or Halloween display area.
- Create multiple pumpkins in different colours and sizes to make a festive pumpkin patch.

2. Pumpkin Paper Bracelet Craft
Create a fun and wearable Halloween pumpkin bracelet that children can decorate with their own silly or spooky jack-o’-lantern faces. This easy craft combines drawing, cutting and assembling skills to create a festive accessory that fits comfortably around a child’s wrist.
Materials Needed:
- Coloured copy paper
- Pencil
- Ruler
- Scissors
- Coloured markers, crayons, or pencil colours
- Glue stick / PVA glue
- Popstick (craft stick)
Step-by-Step Instructions:
Step 1: Draw the Pumpkin
- Using a pencil, draw a pumpkin shape measuring approximately 4cm wide x 6 cm high on a piece of copy paper.
- The pumpkin should be large enough to decorate with a face while remaining lightweight and comfortable when attached to the bracelet band.
Step 2: Cut Out the Pumpkin
- Carefully cut around the outline of the pumpkin shape using scissors.
- Set the pumpkin aside once it has been cut out.
Step 3: Create the Pumpkin Stem
- Draw a small stem measuring approximately 2 cm wide x 2.5 cm high on a piece of green copy paper.
- The stem will add a realistic finishing touch to the pumpkin and help bring your Halloween character to life.
Step 4: Attach the Stem
- Apply a small amount of glue to the back of the green stem and attach it to the top of the pumpkin.
Step 5: Outline the Pumpkin
- Using a black marker, carefully trace around the outer edge of the pumpkin.
- This bold outline helps the pumpkin stand out and gives the finished bracelet a bright, cartoon-style appearance that children will enjoy.
Step 6: Add Pumpkin Ridges
- Draw curved vertical lines from the top of the pumpkin to the bottom to create the natural ridges found on a real pumpkin.
- These decorative lines add texture and detail, making the pumpkin look more realistic.
Step 7: Create the Bracelet Band
- Cut a strip of orange cardstock measuring approximately 22 cm long x 3 cm wide.
- This size is designed to fit most children’s wrists comfortably and can be adjusted if needed.
- The strip will form the bracelet band that wraps around the wrist.
Step 8: Create the Slider Openings
- In the centre of the pumpkin, carefully cut two small horizontal slits approximately 3 cm apart and 2 cm long each.
- These openings should be slightly wider than the bracelet band.
- The band will slide through these slits, allowing the pumpkin to sit securely on the bracelet.
Step 9: Decorate the Pumpkin Face
- Use markers to draw a fun jack-o’-lantern face on the pumpkin.
- Children can draw a silly smile, a spooky grin, funny eyes or a classic Halloween expression.
Step 10: Assemble the Bracelet
- Thread one end of the bracelet band through the top slit and then back through the bottom slit to secure the pumpkin in place.
- Wrap the band around the child’s wrist and adjust the size as needed.
- Secure the ends together with tape or glue or a staple to complete the bracelet.

3. Pumpkin Pop-Up Ghost
Create a fun Halloween craft where a friendly ghost magically pops out from inside a pumpkin. This interactive activity encourages creativity, develops fine motor skills, and provides children with a playful decoration they can enjoy long after the craft is complete.
Materials Needed:
- Coloured copy paper
- Pencil
- Ruler
- Scissors
- Coloured markers, crayons, or pencil colours
- Glue stick / PVA glue
- Popstick (craft stick)
Step-by-Step Instructions:
Step 1: Draw the Pumpkin
- Using a pencil, draw a large pumpkin shape onto a piece of orange copy paper.
- Make the pumpkin large enough to hold a small ghost inside.
Step 2: Cut Out the Pumpkin
- Carefully cut around the outline of the pumpkin using scissors.
- Take your time when cutting around the curved edges to ensure the shape is neat and smooth.
- Once finished, place the pumpkin cut-out aside while you prepare the remaining pieces.
Step 3: Add Pumpkin Details
- Use a marker to draw curved vertical stripes across the pumpkin from top to bottom. These lines help create the look of a real pumpkin and add extra detail to your craft.
- You can also colour the stem green or add additional decorations if desired.
Step 4: Draw a Ghost
- On a separate piece of paper, draw a ghost shape that is small enough to fit inside the pumpkin.
- Make sure the ghost is not wider than the pumpkin so it can easily slide up and down inside the finished craft.
Step 5: Cut Out the Ghost
- Using scissors, carefully cut around the outline of the ghost. Follow the curved edges closely and try to keep the shape smooth.
- Once cut out, place the ghost on the table ready for decorating.
Step 6: Decorate the Pumpkin and Ghost
- Use markers to add facial features and details to both the pumpkin and the ghost.
- Draw eyes, a nose and a mouth on the pumpkin to create a jack-o’-lantern face. Then decorate the ghost with eyes and a fun expression.
Step 7: Create the Peek-a-BOO Opening
- Carefully cut a horizontal slit across the upper third of the pumpkin. This opening should be long enough for the ghost to pop through.
- The slit will become the window where the ghost appears and disappears during play.
Step 8: Create the Pumpkin Pocket
- Draw and cut out a second pumpkin shape that matches the first pumpkin.
- Apply glue around the outer edges only and stick it to the back of the decorated pumpkin.
- Be careful not to glue the centre section and leave an opening at the bottom, as this creates a pocket where the ghost and pop stick will slide.
- Allow the glue to dry completely before moving on to the next step.
Step 9: Attach the Ghost to a Pop Stick
- Glue the ghost securely to the top of a pop stick.
- Position the ghost so it sits upright when the stick is held vertically.
- Leave it to dry for a few minutes to ensure it stays attached while moving.
Step 10: Assemble and Play
- Insert the popstick into the pocket at the bottom of the pumpkin.
- Gently slide the stick up and down so the ghost appears through the slit and then hides back inside.

For even more Halloween crafting fun, explore our collection of spooky, creative and kid-friendly projects! Perfect for classrooms, childcare centres and at-home crafting, each project encourages creativity, develops fine motor skills and provides children with fun decorations, practical keepsakes and spooky accessories they can proudly make and take home.
Get ready to bring some Halloween magic to life with these 4 projects for kids! Create a Paper Plate Witch, make a spooky-cute Hanging Spider Bookmark, design a quirky Frankenstein Paper Bracelet, or assemble a 3D Paper Bat to hang in their room.
Turn your favourite spooky characters into playful, bouncy paper creations. Whether it’s a bouncing ghost, a wobbly pumpkin, or a dancing skeleton, this craft is easy to make and even more fun to play with afterward.
Whether you’re a teacher, parent, or Halloween fan, creating Halloween-themed bookmarks is a fun and creative craft project.